Join me for an in-person class focused on mass-producing card front backgrounds!
You'll create 8+ backgrounds using various inky techniques, including:
3 versions of Ink Smooshing
Night Sky Ink Blending
Stencil Lift
Shadow Stenciling
And more!
Plus, enjoy 2 bonus panels featuring:
Relief Paste
Joseph’s Coat Technique
A fun, hands-on session perfect for building your cardmaking stash!
Date/Time: Saturday, September 27th, 2025, 10am-11:30amMT (90 minutes)
Location: Calgary Scrapaganza, Thorncliffe Greenview Community Center, 5600 Centre St.N, Calgary, Alberta
Cost of Class: $25*
* class kit is comprised of detailed instructions for background techniques, all premium cardstock needed for 8+ backgrounds, 1 stencil, 1 package of Altenew Gem Sparkles, 3 A2 card bases and die cuts to complete three cards. Class fee also includes your entry fee to the marketplace if you are not registered for the crop.
Register: email rosieneust@gmail.com...Subject Line Scrapaganza Class
Note: If you are not able to attend buy may be interested in a virtual option please email your interest to rosieneust@gmail.com.
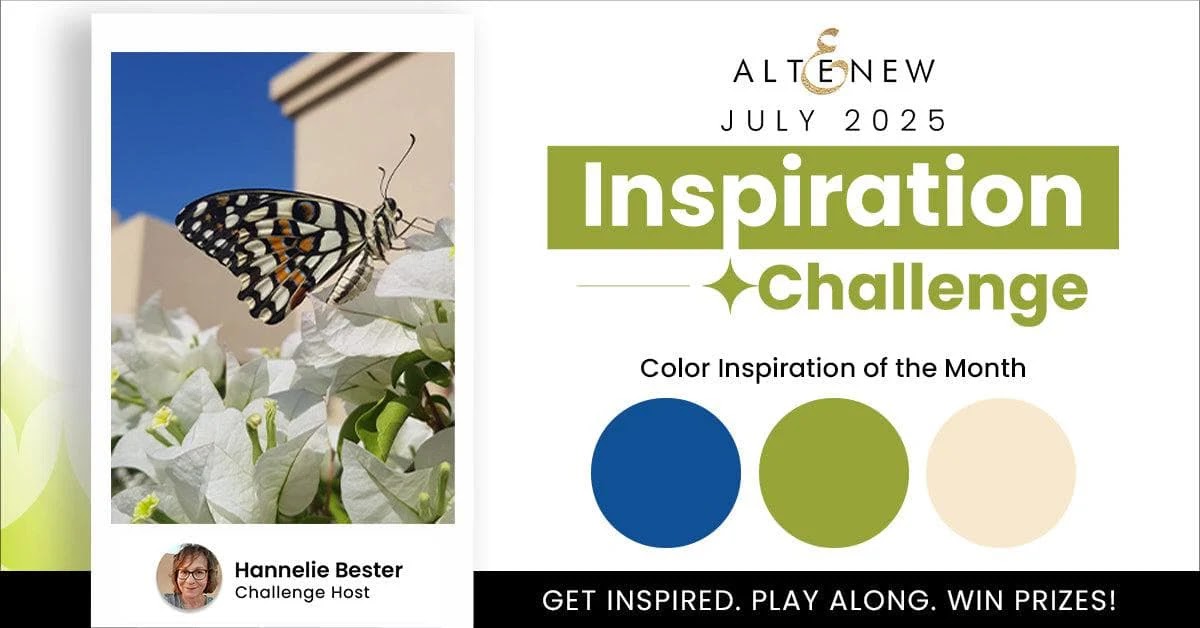
I'm playing along with the latest Altenew Inspiration Challenge!
I happened to be working on some Artist Trading Cards for a swap when I checked out the post and the colours I was using were the same as the colour inspiration!
What are Artist Trading Cards? 2.5" x 3.5" cards that are handmade, unique works or a small series work of art that may be inspired by a theme which can be traded with others.
I used the Let's Go stamp and stencil, Grass Field and Shadow Creek Fresh Dye Inks, Vanilla Cream, Caribbean Sky and Sapphire Crisp Dye Inks.
I added stars with the Milky Way stencil and Pearl Shimmer Relief Paste.
It's really fun creating these small pieces of art, a great way to play with techniques and supplies!
I'm playing along with the latest inspiration challenge at Altenew and created a card with the Zero-Waste Flowery Pattern 3D Embossing Folder.
Here's a close up look:
I embossed two panels, inking the embossing folder and then running a white card stock panel through the die cut machine to transfer the ink to the paper.
I fussy cut the florals from the second embossed white panel, inked with Aqualicious Fresh Dye Ink and then adhered to the first panel with Instant Dimension Foam Tape. I embellished with enamel dots and Satin Gold sequins after misting the panel with Iridescent Ink Spray.
Welcome here and I am super excited to share my projects from this fabulous April release!
Before I get to the projects I want to say HAPPY 10th ANNIVERSARY and thank Altenew for inviting me to this release as the November Inspiration Challenge winner. If you haven't played along with the inspiration challenges I highly encourage you to do so and you will have the opportunity to join a new release reveal!
The hop starts at the Altenew Card Blog and you can find the entire April 2024 release right HERE !
Below is a glimpse of some of the projects I created for this release, scroll down to see them all full size!
This is a long post so relax and enjoy or feel free to view the round-up video instead!
GIVEAWAY!
$300 in total prizes! To celebrate this release,Altenew is giving away a $100 gift certificate to 1 lucky winner and a $50 gift certificate to 4 winners! Please leave a comment on the Altenew Card Blog and/or each designer’s blog post on the blog hop list below by 04/17/2024 for a chance to win. Altenew will draw 5 random winners from the comments left on each stop of this blog hop and announce the winners on the Altenew Winners Page on 04/19/2024.
*The winner of the $100 gift certificate will be chosen from comments left on the Altenew blog.
BOUQUET OF POPPIES BUNDLE
Bouquet of Poppies Bundle is an 8x10 stamp set, coordinating die and colouring stencil!
I've stamped and heat embossed a portion of the poppies image on black card stock in Antique Gold embossing powder. I then colored with the Metallic Watercolor 14 Pan and once dry, arranged the Rounded Rectangles Die set dies, holding in place with low tack tape and running through my die cut machine. I cut a few extra die cuts from black card stock to to create dimension with and pieced the image back together alternating stacking die cuts and gluing flat on the card front.
This is a great stamp set to use different colouring mediums with and practice your colouring. In addition to the large bouquet image, it also two individual poppy stamps your can stamp and die cut multiple image to craft your own bouquet.
After stamping the images I used the stencil to add Peachy Keen Fresh Dye Ink and Rouge Crisp Dye Ink to two of the blooms, then adding details with Cotton Candy, Peach Parfait and Blush Artist Markers. The red blooms were first inked with Blush Crisp Dye Ink and then the details were added with Blush, Coral Berry and (a little) Limestone Artist Markers. The centre red poppy also used some Crimson Artist Marker and the stems and leaves are coloured with Lettuce Celebrate and Forest Fern ink.
Sentiment is from the stamp set and heat embossed with Antique Gold embossing powder on a die cut from the One-Go Die.
I always love experimenting with inking the colouring stencils on their own and the lovely, soft feel of these cards is the result! It's great to be able to use your supplies in different ways for maximum value!
I inked the blooms with Peachy Keen Fresh Dye Ink and a touch of Rouge Crisp Dye Ink. Leaves and centers are inked with Lettuce Celebrate Fresh Dye Ink and Forest Fern Crisp Dye ink. I trimmed the panel, stamped the sentiment in Obisdian Pigment Ink and matted on black card stock. The panel is then adhered to an A2 card base and embellished with the BRAND NEW Smoky Quartz Gem Sparkles. You can see in the photo these range from an almost clear to a deep smoky colour. These add a lovely sparkle and shine to the card.
Below are a couple more stencil only cards and in the first image you can see a little bit of the brand new Micro Blending Brushes also brand new!
For this last stenciled card I inked the individual poppies and butterfly using the stencil, then die cut and added to a card panel, using Instant Dimension Foam Tape for the butterfly and embellishing with some Antique Gold Sequins.
BAROQUE ELEGANCE PRESS PLATE
You saw this next product in that navy embossed background earlier, say hello to the Baroque Elegance Press Plate!
I die cut a Timeless Sentiment 2 Die Set sentiment from the centre of the panel along with 3 more cut from plain white card stock. I adhered the panel to a black card stock mat, layered the sentiment die cuts together and topped with the inked die cut. I adhered the stack back into the die cut area and lastly added a few gems from Smoky Quartz Gem Sparkles.
If you also own a hot foil system you can get excellent hot foil results with your press plate!
I foiled some coloured card stock from my stash with gold foil and my Go Press and Foil system. After foiling, I fussy cut along the foiled pattern creating a diagonal edge. I then used my Big Shot and tan embossing mat to emboss a piece of white card with the press plate.
I adhered the foiled, fussy cut pieces on opposite corners with Instant Dimension Foam Tape and the sentiment from the Timeless Sentiments 2 die set cut from the same coloured card stock and Gold Mirror Cardstock between the foiled pieces. A trio of gems from Deep Blue Sapphire Sparkles complete the card.
Now the foiled card above means that your left with foil with the negative of the above pattern. You can also foil that piece if you have a solid foil plate but if you don't, grab some double sided adhesive and glitter! (It's tough to photograph foiling, my apologies for the sub-par photos.)
Trim a piece of double sided adhesive and white card stock to 4" x 5 1/4" and apply the adhesive to the card stock, peel off the release paper to expose your adhesive. Carefully lay your foil on top of the adhesive and burnish on to the adhesive. Peel off the release layer and you are left with the gold foiled pattern and the white "exposed" areas are sticky to apply the glitter to.
I pulled out some fine blue glitter from my stash but a fine white glitter would be stunning as well, sprinkled it over the entire panel, tapped off the excess and burnished with my finger.
This time I die cut the word from Gold Foil Cardstock and the shadow from coloured card, again I embellished Deep Blue Sapphire Gem Sparkles.
PINK STAR TULIP DIE
I die cut all the pieces from white card stock and then inked each with the Micro Blending Brushes and Dusk, Ocean Waves and a little Baby Pink Crisp Dye Inks on the petals and Jade and Eucalyptus Fresh Dye Inks on the leaves. I misted all the die cuts with Altenew Iridescent Spray Ink.
The key hole system makes it super easy and quick to line everything up and I used liquid glue to hold everything together.
I dry embossed a white card front with the Baroque Elegance Press Plate then added Coral Berry, Grapevine, Sapphire and Jet Black Mixed Media Ink direct-to-paper (rub the ink pads directly over the paper). I added the ink to the "debossed side"- pattern is pressed into the paper.
I again used the Baroque Elegance Press Plate for this background but I hot foiled it with black foil. You can get the exact same look using it with black ink and your Betterpress system.
I added the colour to the tulip die cuts with Artist Markers from the Altenew Water Garden set. I used my flower shaping tools to add some curve to the petals then layered together following the keyholes.
I die cut the frame with the Gold Foil card stock, white card stock and the oval from a die in my stash. I stacked the white die cuts and gold die cuts together and placed in the center of the panel. The bloom is adhered with foam tape just inside the frame. Sentiment is from the Timeless Sentiments 2 die set and the shadow is cut from card stock inked with the same green used on the leaves to tie it all together.
I added sparkle to the bloom and title with Stickles from my stash.
CRAFT YOUR LIFE PROJECT KIT: RUSTIC CHARM
This kit is so easy to create a beautiful card that looks like it took hours to make but actually comes together very quickly!
I embossed the fence with the kit 3D folder and added Hazelnut Crisp Dye Ink with the kit stencil. The kit stencil adds so much colour to the birds, it was fun choosing colours to use. I used Eucalyptus, Lemon Ice, Dew Drops, Crimson, Buttercream, Sand Dunes and Alpine Aster ink colours for this bird along with the Micro Blending Brushes which are perfect for inking small areas!
After die cutting the images, stamping and heat embossing the sentiment with Obsidian Pigment ink and clear embossing powder, I layered them all with Instant Dimension Foam Tape over the fence and the sky inked with the Altenew Cloud Scene Stencil and Dew Drops ink.
This kit also features this beautiful floral image which I've coloured with inks and the colouring stencil and then die cut. I cut extra die cuts from white card stock and stacked them behind the image to avoid cutting teeny pieces of foam tape for the smaller areas as my background is dimensional too.
I've cut branches with the kit branch dies from white card stock and arranged them on a white card front and trimmed off any overhanging pieces. After spattering with the Jet Black Water Color Brush Marker, I glued the stacked die cut image to the center, added the stamped sentiment with foam tape and finished off with Smoky Quartz Gem Sparkles, these are the lightest coloured ones in the pack.
This is one of my two favourites I made with this kit and it is so easy to create! I created my own hillside with masking paper and inked the grass with Lettuce Celebrate and then the sunset with Lemonade Stand, Peachy Keen, Tickled Pink, Ride the Wave and a little bit of Be Grapeful Fresh Dye Ink. I added a touch of Jet Black Crisp Dye Ink around the edges.
After embossing black card stock with the fence 3D folder, I fussy cut between the planks, then adhered to the inked card front. The branch and bird are stamped and heat embossed with clear embossing powder on black card stock and then die cut with the coordinating die. Bird is adhered with Instant Dimension Foam Tape and the other die cuts are glued down with liquid adhesive. Sentiment is from the kit and stamped with Obisidian Pigment Ink. Dark coloured gems from Smoky Quartz Gem Sparkles complete my version of a silhouette card with this set.
If you've hung in there up to this point, my SINCERE THANKS as this is a long one! We've come to the last project, my second of two favourites created with this kit.
I've created a vintage vibe with a Metallic 14 pan watercoloured panel, Motif Tile 3D embossing folder, Floral Lace Die and Antique Gold Embossing Powder.
I combined the kit colouring stencil, Water Hyacinth, Alpine Aster & Dusty Rose Fresh Dye Inks and Silver Lake, Gray Denim, Vanilla Cream and Sand Dune Crisp Dye Inks. I've added details with the Altenew Woodless Colouring Pencils.
I've used a die from the Rounded Rectangles Die set to cut out bird and then inked the edges with clear embossing ink and heat set with Antique Gold Embossing Powder.
Sentiment is from the kit, stamped and heat embossed with the same powder, fussy cut and then popped up with foam tape over the background along with the focal image.
There are so many different ways to use 3d embossing folders so I thought I'd challenge myself to colour the gorgeous Beautiful Bergenia folder for the March Inspiration Challenge!
I inked the flat side of the embossing folder with Altenew Buttercream Crisp Dye ink to create the soft yellow background and then coloured the raised areas with Artist Markers.
I kept it simple and finished off the card with a die cut sentiment from the Versatile Greetings Die set and stamped sentiment from the Bold Bouquet Outline Stamp set.
I had so much fun creating this card for the latest Altenew Certified Educator's Instagram Hop! Don't forget to leave a comment on my INSTAGRAM @rosieneust for a chance to win a gift card from Altenew!
Receive a FREE brand-new Little Mushroom House Stamp Set ($4.99 value) with every* order from 10/06/2022 at 12:01 am EDT until 10/08/2022 at 11:59 pm EDT. *Free gift is not valid on online class, workshop, gift card, and monthly subscription plan orders. The free gift will be added to cart automatically on eligible orders while supplies last.




.jpg)


